Drying Flowers with Silica Gel for Everlasting Blooms
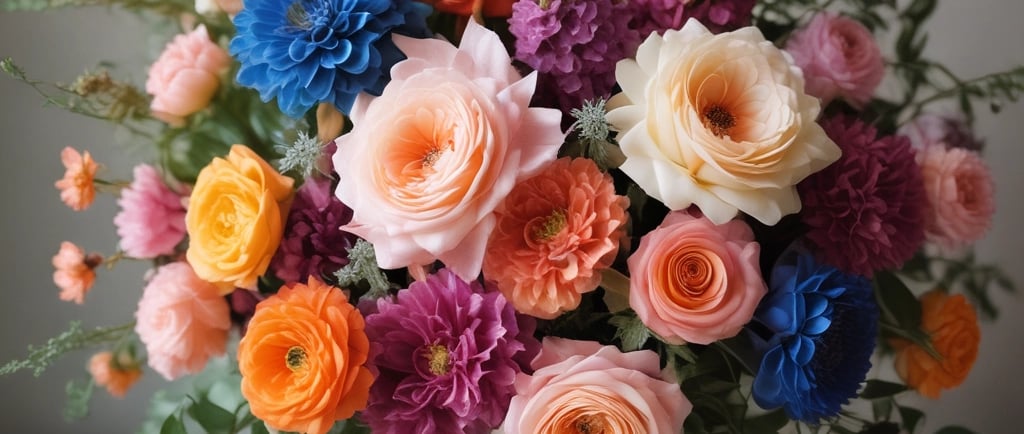
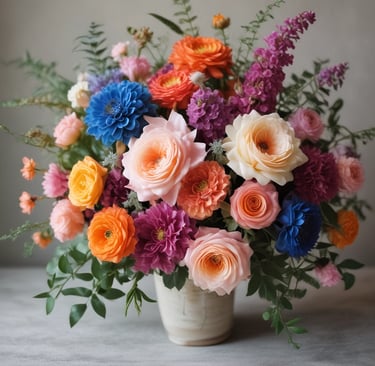
If you've ever looked at a beautiful bouquet and wished you could just hit pause, keeping those perfect blooms exactly as they are forever, you're not alone. The vibrant colors, the delicate shapes—it’s all so fleeting, isn't it? Well, what if I told you there's a simple, almost magical, way to capture that moment in time? It’s true! We're going to talk about preserving flowers with silica gel, a method that lets you keep the beauty of fresh flowers for years to come.
8/23/20256 min read
Drying flowers has been a thing for centuries, of course. People have been air-drying, pressing, and doing all sorts of things to hold onto their floral treasures. But honestly, those methods can sometimes leave your flowers looking, well, a little sad and flat. That's where silica gel swoops in like a superhero. It's a desiccant, which is just a fancy word for something that soaks up moisture like a sponge. When you use it to dry flowers, it pulls all the water out super fast, locking in their original shape and stunning colors. This isn't your grandma's flower pressing; this is next-level preservation.
So, What's the Big Deal with Silica Gel, Anyway?
You might have seen those tiny little packets of silica gel beads in a new pair of shoes or a purse. Those are there to keep things dry, and it’s the same principle here, just on a larger, more intentional scale. The silica gel method is fantastic for a few reasons. First off, it’s quick—we're talking a few days, not weeks. Second, it's a champ at retaining color. Those bright reds and vibrant yellows stay that way. And perhaps most importantly, it keeps the flower's three-dimensional form. A beautiful, full-bodied rose will stay just that: a beautiful, full-bodied rose.
Now, before you go and grab that packet from your shoe box, a quick heads-up: the kind you use for flowers is a bit different. It’s a fine, granular powder with tiny crystals, and it’s often mixed with an indicator that changes color to tell you when it’s full of moisture and needs to be "recharged" (we'll get to that in a minute).
Let's get into the nitty-gritty of how to get started.
The Essential Tools for Your Flower Drying Adventure
Don't worry, you don't need a fancy science lab for this. You probably have most of what you need already.
You'll want to gather:
Fresh Flowers: The fresher the better! Pick them right after they've bloomed.
Silica Gel: This is the star of the show. You can find it at most craft stores or online.
An airtight container: A plastic Tupperware with a good seal or even a big cookie jar with a tight lid works wonders.
Scissors or gardening shears: To trim those stems.
A soft paintbrush or makeup brush: For gently dusting off the gel afterward.
A pair of tweezers (optional): These can be handy for handling delicate blooms.
Preserving Flowers with Silica Gel: A Step-by-Step Guide
The process itself is surprisingly simple. Think of it like a beautiful burial for your flowers, but one that leads to a second life as a stunning keepsake.
Prep Your Flowers: This is crucial. Choose flowers that are in their prime, without any bruises or brown spots. Trim the stems down to about an inch or two. You want them to be short enough to fit comfortably in your container but with enough stem left to handle. Remove any leaves that would get in the way.
Create a Silica Gel Bed: Pour a layer of silica gel, about an inch deep, into the bottom of your airtight container. Spread it out evenly.
Nestle the Blooms: Carefully place your flowers on the silica bed. For most flowers like roses or zinnias, you’ll want to lay them on their sides or place them bloom-side up. For flatter flowers, you can put them face down. Just make sure they aren't touching each other. This is really important for getting an even dry.
Cover Them Up: This part requires a bit of finesse. Slowly and gently pour more silica gel over and around the flowers. Don't just dump it! Use a spoon or a scoop to carefully pour the gel into every nook and cranny, especially between the petals. The idea is to support the flower's shape as it dries. You should completely bury each flower.
Seal and Wait: Pop that lid on tight! You need to make sure the container is completely sealed to trap the moisture. Place the container in a cool, dry place. The magic happens over the next few days. The drying time really depends on the type of flower—smaller, thinner-petaled flowers might be ready in just a couple of days, while a big, dense rose could take a week or more. A good rule of thumb is to check after about four days.
The Big Reveal: When you think they're ready, carefully pour off the silica gel to uncover your flowers. They should feel dry and papery. If a bloom still feels soft or flexible, it needs more time. Once they're dry, use that soft brush to gently whisk away any remaining silica gel. Be gentle—they are delicate now!.
Some Common Questions About This Flower Drying Method
What kind of container should I use?
Honestly, anything that's airtight will work! Plastic food storage containers, a big mason jar, or even a shoebox lined with plastic wrap and a tight-fitting lid. The main goal is to keep outside air—and its moisture—from getting in.
How do I know when the flowers are ready?
The easiest way is to gently check them. They should feel brittle and papery, not soft or mushy. A great hack is to dry one small, test flower first, so you get an idea of the drying time for your particular blooms. Also, if your silica gel has indicator crystals, you'll see them turn from blue to pink when they've absorbed all they can.
Can I reuse the silica gel?
Yes! That's one of the best parts. Once the gel is saturated and the indicator crystals are pink, you can "recharge" it. Just spread it on a baking sheet and bake it in the oven at a low temperature (around 250°F or 120°C) for a few hours. When the crystals turn back to blue, it's good to go!
What kind of flowers work best?
Flowers with thick, dense petals like roses, peonies, carnations, and tulips do incredibly well. More delicate flowers like daisies and cosmos can also work, but they require a little more care during the embedding process. Hydrangeas are another great option as they often lose their color when air-dried but retain it beautifully with silica gel.
A Few Insider Tips for Perfect Results
Prep is Everything: Make sure your flowers are at their peak. Don’t try to save a wilted bouquet that's been in a vase for a week; it won't work out.
The Right Cut: When you trim the stems, consider what you'll use them for. Shorter stems are perfect for shadow boxes, while a slightly longer stem might be better for a vase display.
Handle with Care: Dried flowers are delicate. Think of them as tiny, beautiful glass sculptures. Be gentle when you remove them from the gel and when you’re displaying them. A light coat of hairspray can also help protect them.
Microwave Method: For the truly impatient, you can speed up the process with a microwave. Place the container (microwave-safe, of course) in the microwave with a small cup of water, and microwave in 30-second bursts. This is a bit of a tricky dance, but it can get the job done in minutes instead of days. Just be careful not to "cook" your flowers!
Storage and Display: Once your flowers are dried, keep them out of direct sunlight and away from high humidity. A shadow box, a clear glass vase, or even a sealed terrarium are all beautiful ways to showcase them.
Why This Method is a Must-Try for Flower Lovers
This isn't just a craft project; it's a way to create lasting memories. Think about it: a wedding bouquet, flowers from a special anniversary, or even just a particularly stunning rose from your garden. Preserving these moments with silica gel means you get to enjoy them long after they would have faded away.
The texture and color you get from this method are truly unmatched. While other methods can make flowers feel brittle and faded, the silica gel method gives you blooms that feel almost alive, full of the same shape and vibrancy they had when you first picked them.
It's a rewarding process that bridges the gap between science and art, giving you a chance to create something beautiful and personal. So go on, give it a try. You know what? That next bouquet you get could be your very own piece of everlasting art.