Piping Buttercream Flowers: A Sweet & Simple Guide for Beginners
Master the art of piping buttercream flowers with this sweet and simple guide for beginners. Learn how to choose the right frosting, what essential tools you need (like a piping bag and a flower nail), and get easy, step-by-step instructions for creating beautiful buttercream roses and other floral designs. This tutorial covers everything from fixing common mistakes to arranging your frosting flowers for stunning cake decorating results.
8/23/20255 min read
Piping Buttercream Flowers: A Sweet & Simple Guide for Beginners
If you've ever found yourself scrolling through Instagram, drooling over those stunning cakes covered in what look like real, delicate flowers, you know the feeling. Honestly, it's that mix of awe and a little bit of "I could never do that." But what if I told you that those unbelievably beautiful, piped buttercream flowers aren't just for professional cake decorators? They're totally within your reach, and getting started is way simpler than you might think. Seriously.
Let's be real for a minute. The whole idea of creating a single, perfectly formed rose out of frosting can feel a little intimidating. It’s like trying to learn a new language overnight—you know the words are there, but how do you put them all together to make something that actually makes sense? But here's the thing: just like learning to speak, piping buttercream flowers is all about practice and a few key pointers. You'll get the hang of the rhythm and the pressure, and before you know it, you'll be making bouquets of frosting flowers that are just begging to be eaten. So, let's grab our piping bags and get started, shall we?
The Secret's in the Sauce (aka the Buttercream)
Before we can even think about piping a single petal, we have to talk about the foundation of it all: the buttercream. You know that feeling when you try to build a sandcastle with sand that's either too dry or too wet? It just crumbles or slumps. It's the same with your frosting. For something as detailed as a flower, you need a stiff, pipeable buttercream that holds its shape.
A lot of folks swear by American buttercream for its firm, reliable nature. It's forgiving, so it's a fantastic starting point. But others prefer the silky, less sweet texture of Swiss meringue buttercream, which can be just as good if you get the consistency right. The key, no matter what recipe you use, is to get rid of any pesky air bubbles. After you mix your ingredients, switch to a paddle attachment on your stand mixer and beat the frosting on low for a good 10-15 minutes. It might sound a little extra, but this simple step makes your frosting smooth, creamy, and perfect for creating those pristine petals. You'll thank me later.
What's in Your Tool Kit? The Bare Necessities
Don't let the idea of a fully-stocked decorator's arsenal scare you off. For most beginner buttercream flower tutorials, you only need a handful of essentials. Think of it like a new hobby—you don't need all the bells and whistles to start, just the basics.
A reliable piping bag: You'll need a few of these. I mean, who wants to stop and clean one when you're in a creative flow?
A petal piping tip: This is non-negotiable. For a classic rose or daisy, a Wilton 104 tip is a fantastic place to start. It’s a workhorse of a tip that can do so much.
A flower nail: This little tool might look a bit strange, but it’s your best friend for making individual flowers. It lets you spin the flower as you pipe, which is crucial for creating that layered, spiral effect.
Small squares of parchment paper: These are a must. You'll pipe your flowers onto these squares so you can easily move them to a tray to chill.
A coupler (optional but handy): This is a small plastic piece that allows you to swap out tips on the same piping bag. If you're using multiple tips for one project, it’s a total game-changer.
Food coloring: Gel colors are your best bet here; they're concentrated and won't thin out your buttercream.
Honestly, with just these simple tools, you have everything you need to start creating beautiful edible art.
FAQs: Your Quick Guide to Buttercream Bliss
Are you feeling a little overwhelmed? That's completely normal. Making buttercream flowers for the first time is a journey, and you're bound to have questions. Here are some of the most common ones I hear from people just starting out.
Q: My buttercream is too soft! What do I do?
A: This is probably the most common issue. The heat from your hands can quickly melt your frosting. Try chilling your piping bag in the fridge for 10-15 minutes to firm it back up. If it's still too soft, you might need to add a little more sifted powdered sugar.
Q: Why are my petals jagged and not smooth?
A: This can happen if your buttercream is too stiff or if it has air bubbles. The solution? Mix it longer with that paddle attachment, and if it still feels too stiff, add a tiny bit of milk or cream, a drop at a time, until you get the right consistency.
Q: How do I get the flowers off the nail without ruining them?
A: This is why you pipe them onto parchment paper! When you're done, simply slide the parchment square off the nail and place it on a tray. Then, pop the whole tray in the freezer for about 10-15 minutes. Once they're firm, you can easily transfer them to your cake with a small offset spatula or your clean fingers. It’s like magic.
A Gentle Reminder to Be Patient (and Playful!)
The thing is, nobody gets it perfect on the first try. Or the fifth. Or even the tenth. Remember what I said about practice? You'll learn so much with every flower you pipe. You'll figure out how much pressure to apply, the angle of your piping tip, and how fast to spin the nail. So, what’s the secret pro-tip? Pipe 10-15 practice flowers first. Just scrape them back into the bowl. Yes, really! It's the most freeing thing you can do, and it lets you get a feel for the process without the pressure of it being "for real."
So go ahead, let yourself get a little messy. Experiment with different colors and tip sizes. Make a funny-looking flower with too many petals. It's all part of the fun. Because at the end of the day, you're not just making a dessert; you're creating something beautiful with your own hands. And let me tell you, that feeling of pride when you finish your first cake covered in your very own piped buttercream roses is one of the best things in the world.
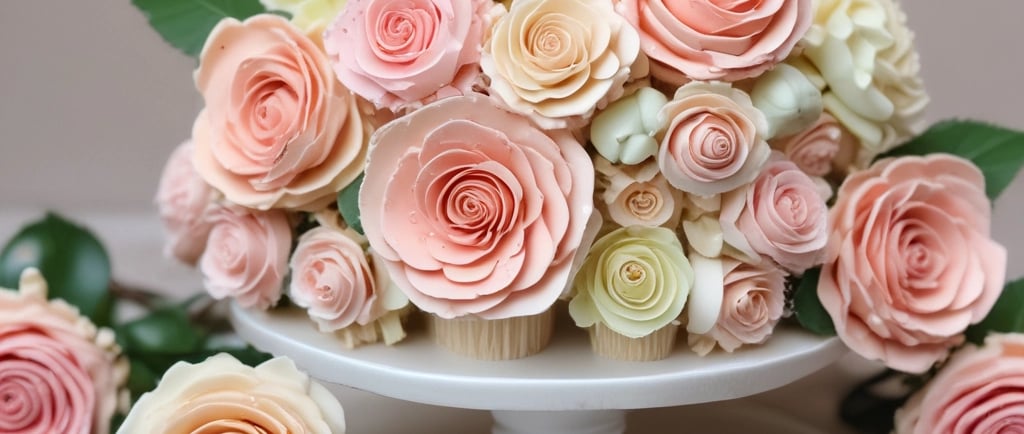
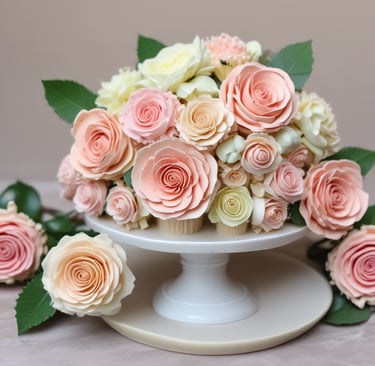
The Final Flourish: Putting It All Together
Once you've got a tray of beautifully chilled, firm buttercream flowers, the hard part is over. Now comes the fun of arranging them. You can use a tiny dab of leftover buttercream to "glue" them onto your cake or cupcakes. Feel free to mix and match different flower styles—a classic buttercream rose here, a charming daisy there. You can even pipe small leaves with a leaf tip to fill in the gaps and make your floral arrangement look even more realistic. It’s your creation, so let your creativity bloom.
And that's really it. It's a journey from start to finish, from mixing that perfect frosting to placing the final frosting flower on your cake. It's a chance to step back from the digital world and create something tangible, something that brings a little bit of joy to those you share it with. Now, isn't that a lovely thought?